Create a Corpus
To begin searching your data, you first have to create a corpus. A corpus is a container where you upload all your data to be ingested and grouped together in a single location for querying.
-
To get started, navigate to the Console Overview.
-
On the left sidebar, click Corpora. This will open an overview of the corpora you have created. It will be empty if this is your first time accessing the console.
-
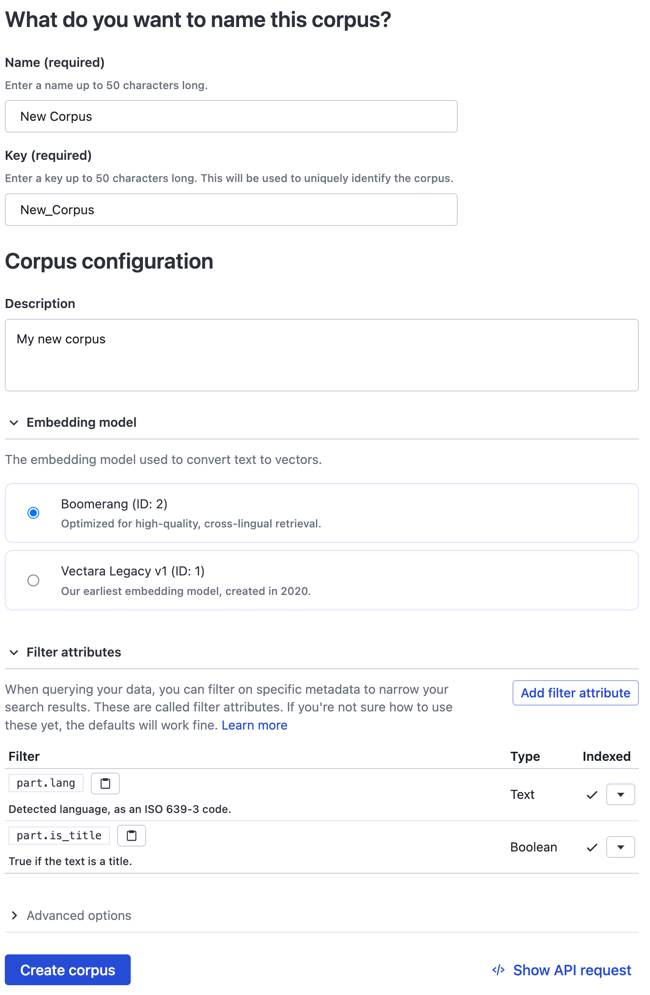
Click Create corpus and a dialog box appears.

-
Select the kind of app that you want to build or select Decide later.
-
Enter the Name of the corpus.
-
Enter the Key of the corpus which will be used to uniquely identify the corpus
-
(Optional) Enter a Description about the corpus.
-
Select an Embedding model, such as Boomerang.
-
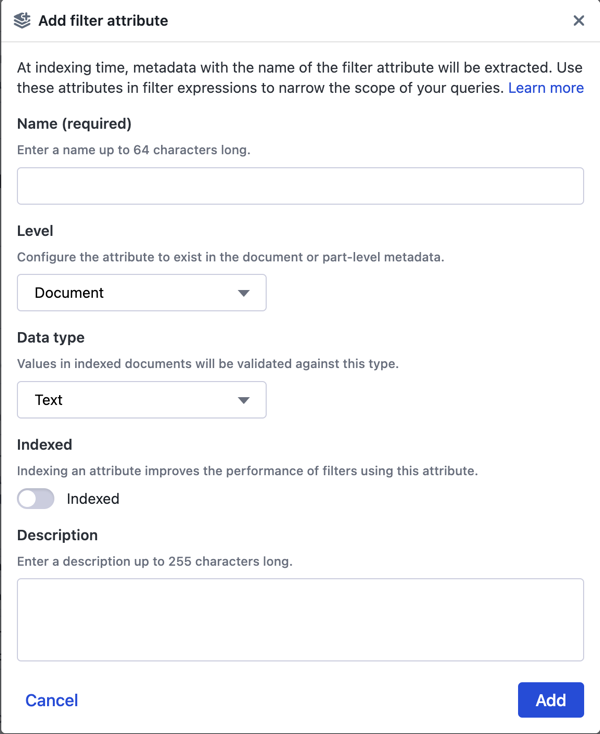
Click the Filter attributes drop-down, click Add filter attribute, and configure attributes at the document or part levels.

-
Select the appropriate Data Type and indicate whether you want this attribute indexed.
-
Click Add to return to the previous page. You can continue adding more attributes.
-
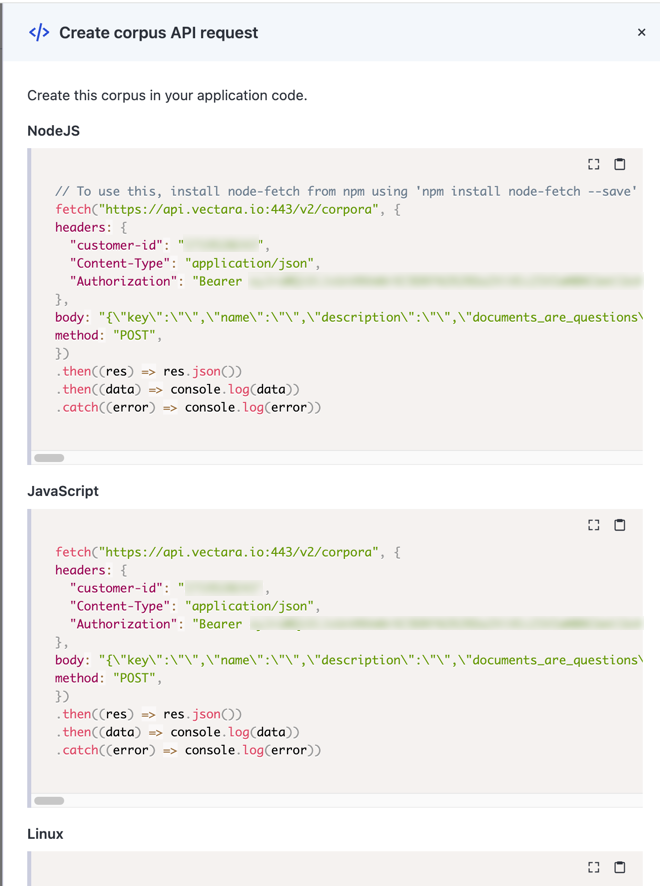
(Optional) Click Show API Request and the request inspector appears. You can now optionally create this corpus by copying and pasting the application code in NodeJS, JavaScript, Linux, or Windows.

-
Click Create.
The corpus is created and a confirmation message appears. It is now ready to receive your data.
View the Corpus Key
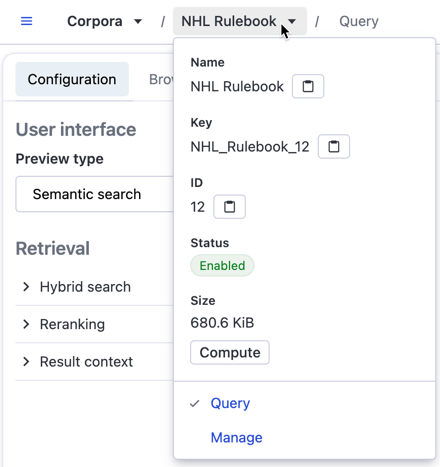
Vectara API requests against a corpus require the Corpus Key. To view Corpus Key and other information about the corpus, select the corpus name from the top-menu:

If you select open a corpus, the following options appear:
Query the corpus
The corpus name drop-down has a Query tab that lets you ask questions about your data. It provides Chat, Summary, and Semantic search interface types, each with their own configuration.
Configure the corpus
The Configuration tab lets you set options for the Chat, Summary, and Semantic search user interface types. You then have several options for retrieval, generation, and evaluation.
Filters
The Filters tab lets you view the filter attributes for the corpus and some syntax examples.
UX preview
This tab provides a preview of your query results.
Data
The Data tab shows a list of documents in your corpus and lists them by ID. It also lets you Load data into corpus. It is the quickest way to ingest your data to start asking some questions.
Settings
The Settings tab displays information about the corpus, the current embedding model, indexing semantics, and filter attributes and custom dimensions (Pro and Enterprise only). This page also has a Dangerous actions section that lets you disable the corpus, clear corpus data, or delete the corpus.
Access Control
The Access control tab defines the users and roles that have access to the corpus. You can also create new user roles, a default role, and API keys associated with this corpus.
Query histories
When experimenting with configurations and running queries, you can log your queries into a query history. This enables you to troubleshoot issues, inspect past queries, and optimize query configurations.
Analytics
The Analytics tab provides usage statistics about the corpus and you can
download this data in .SVG, .PNG, or .CSV format.