Manage Team Members
This section lets you add team members and manage the access levels of these users. For example, you can adjust account and corpus level authorizations. You can also transfer your Vectara account ownership to another user.
Review the Authentication and Authorization guide to learn how to set up user permissions, review enterprise access patterns, authentication methods and so on.
Invite team member
The Account Admin can create users. After login, navigate to the Team tab to create new users and manage existing ones.
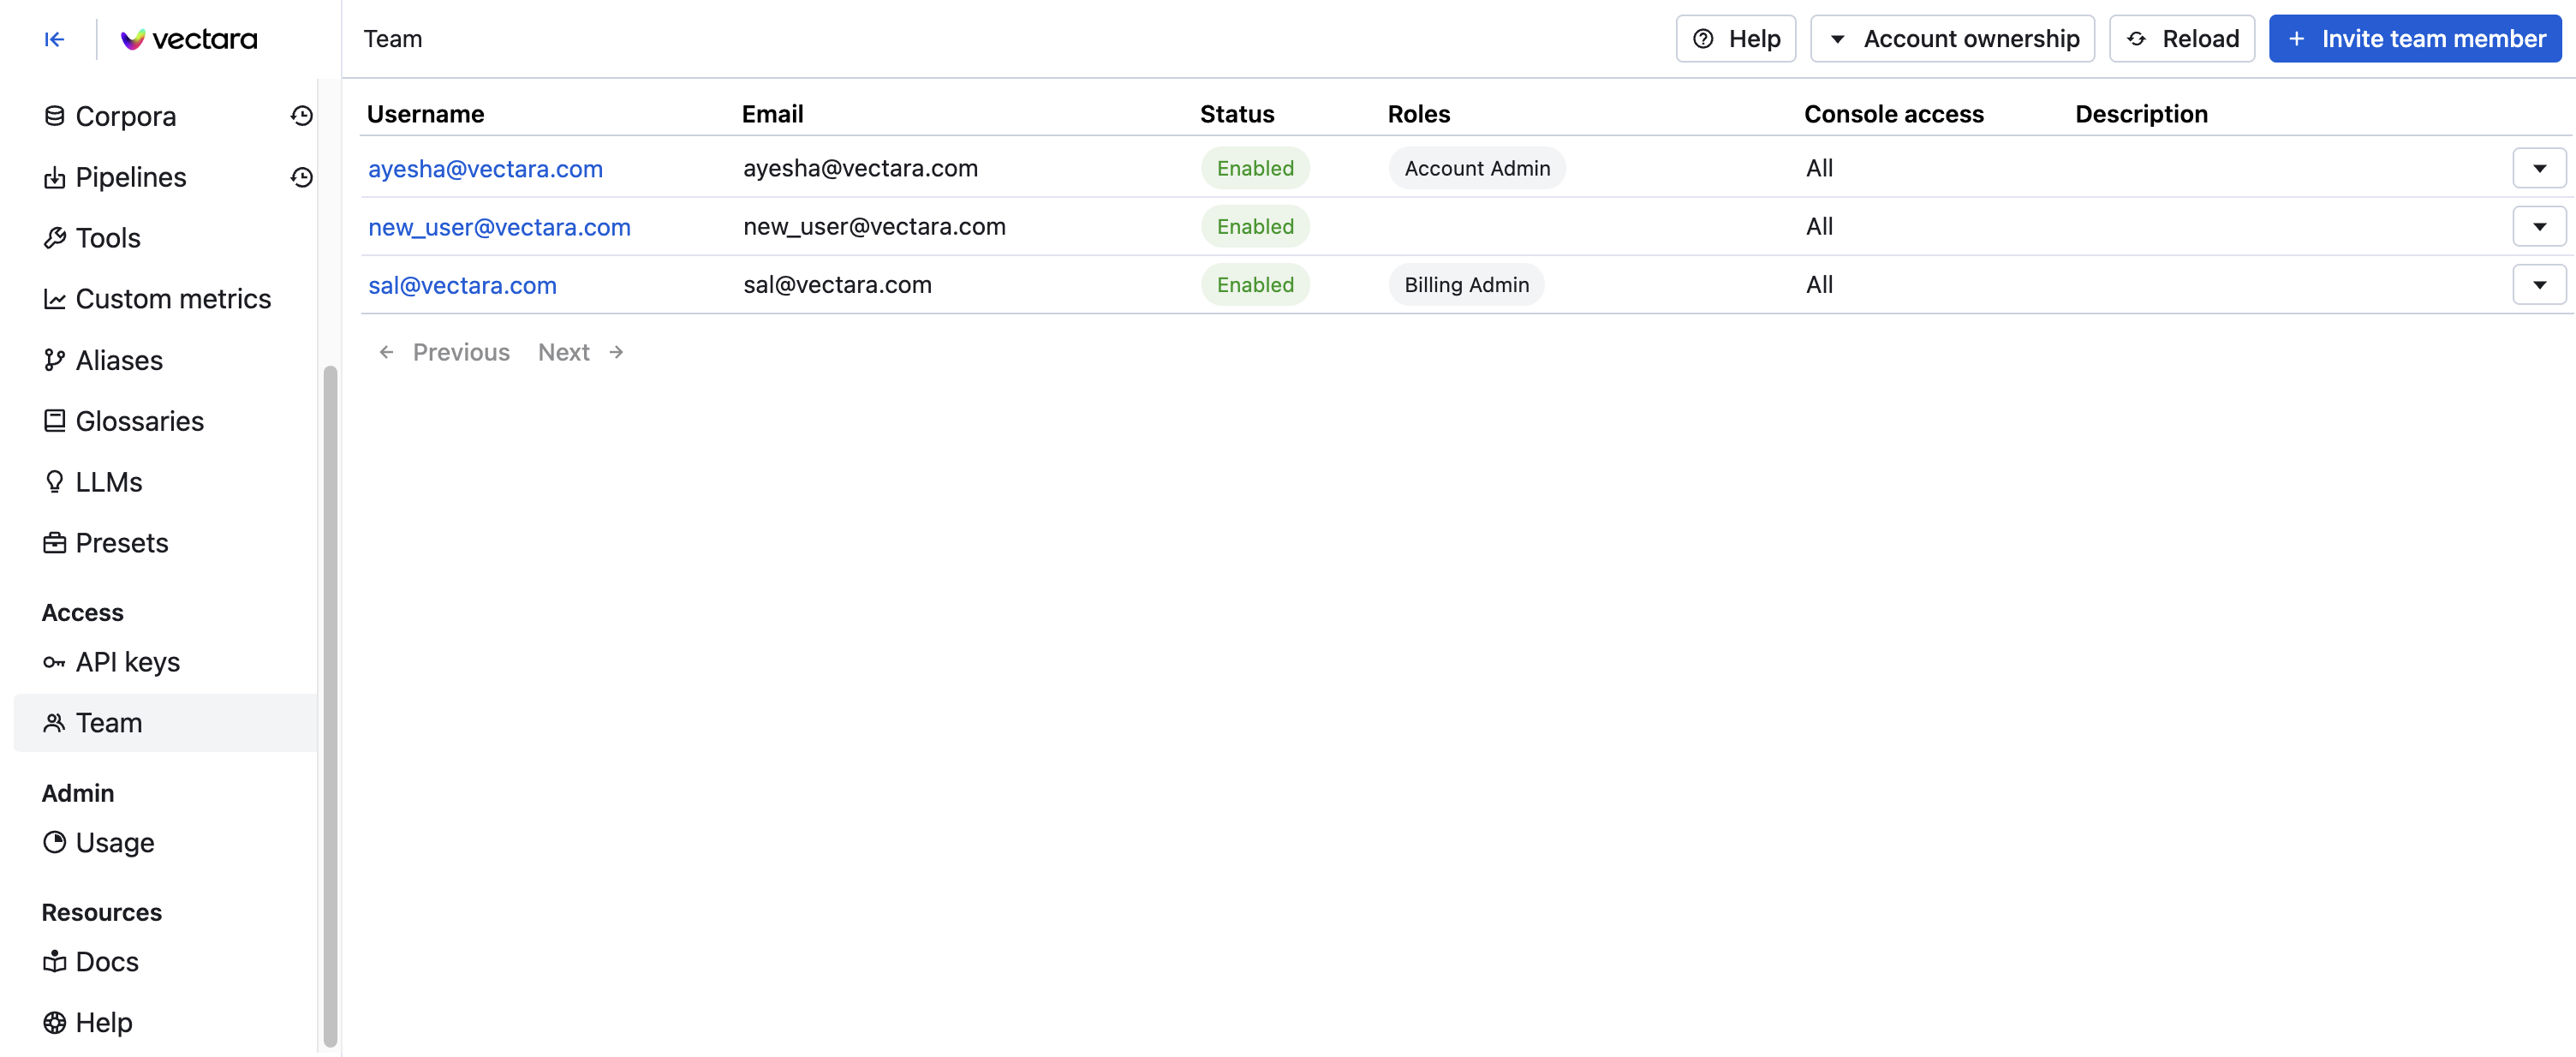
- Click Invite team member
- Enter user details including the email, user name, and a description.
- Select a role or multiple roles to assign with this user:
- Account Admin
- Corpus Admin
- Billing Admin.
A user without assigned roles at the account level can still be given corpus-level roles.
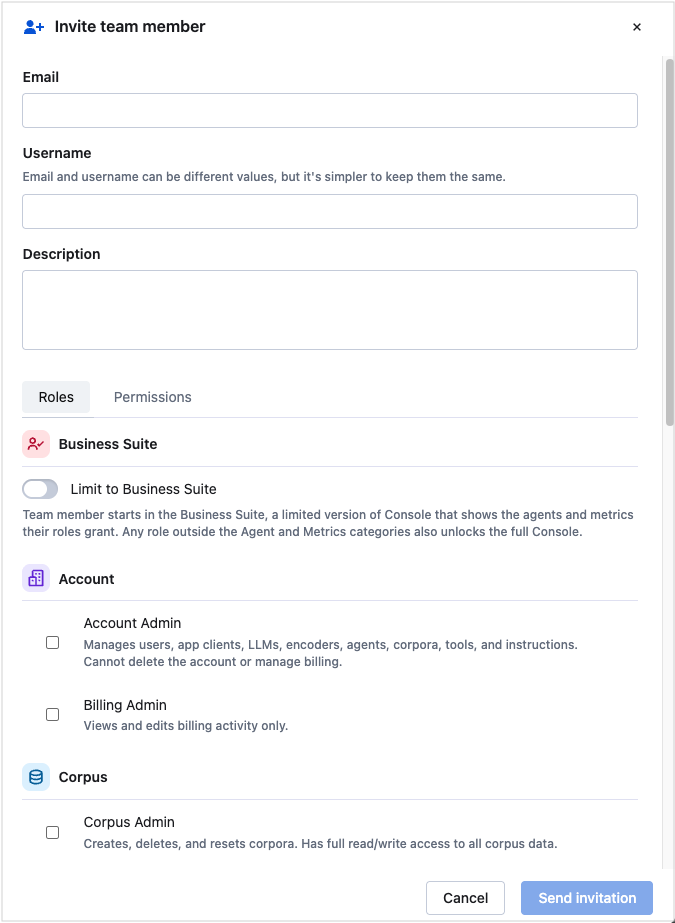
- Click Send invitation.
The user appears in the Team list after they accept the invitation.
Edit team member
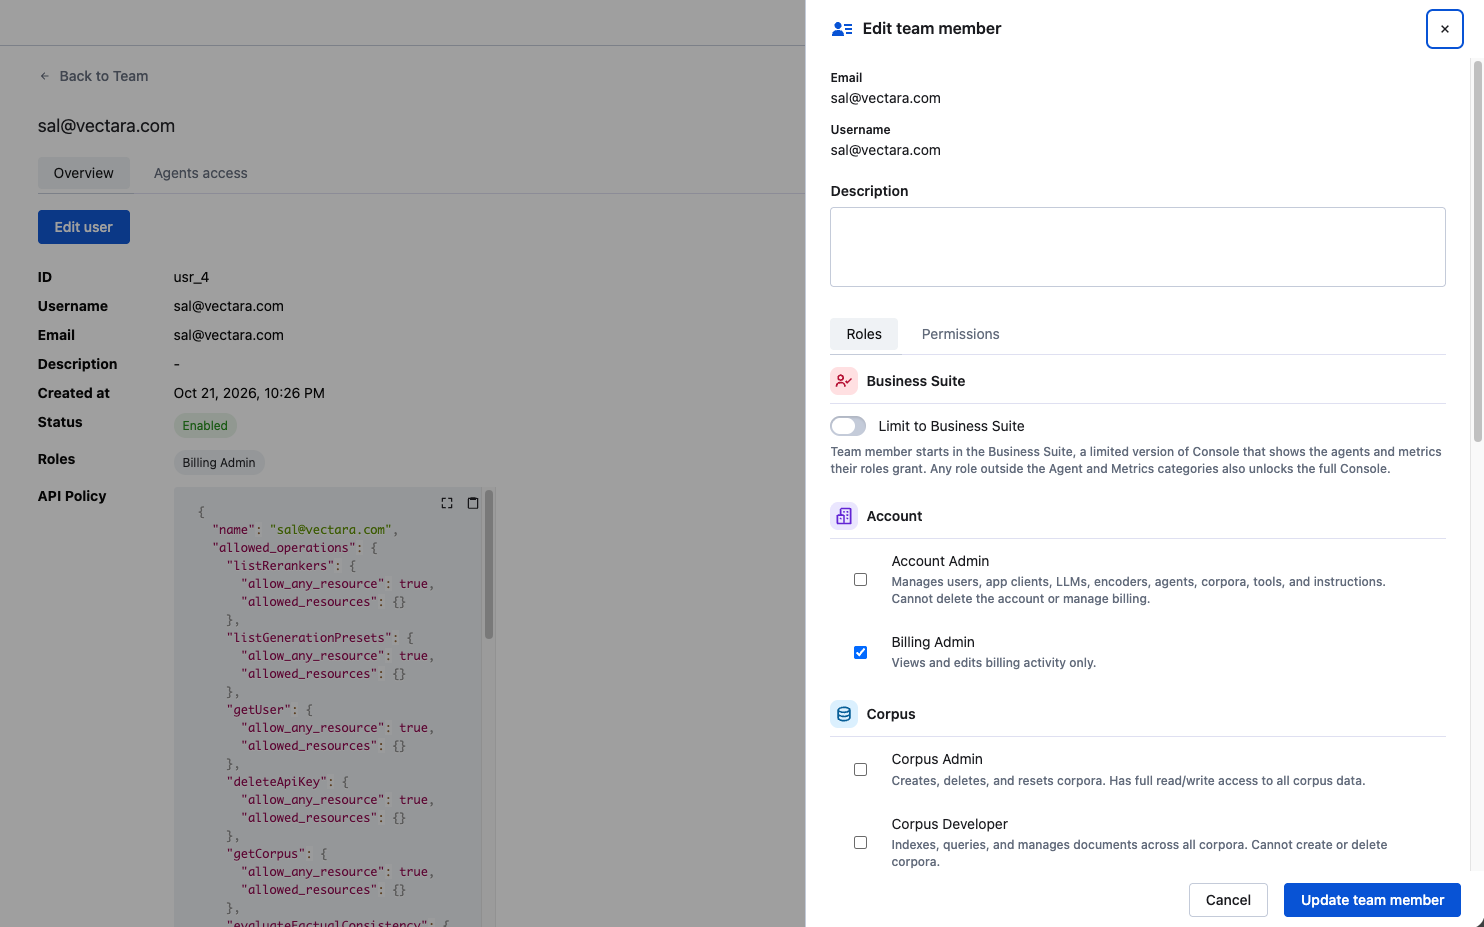
- In Team, select the member's Username to open their details.
- Select Edit user.
- Update the user's description or role assignments.
- Select Update team member to save, or Cancel to leave without saving.
On the user's overview, Dangerous actions provides separate controls to reset their password, enable or disable access, and delete the user. Depending on your deployment's configuration, password reset sends an email or provides a one-time code. Review the deletion warning and confirmation before proceeding.
Account owners can transfer ownership of the account to a new owner.
Set up a Business Suite user
This setup is performed in Console by an account administrator, not by the Business Suite user. Business Suite provides a simplified interface for working with existing agents and viewing their performance.
Permissions and security boundary
Limit to Business Suite changes the user's interface. It is not a role and does not grant or remove API permissions. A user configured this way starts in Business Suite. Whether they can switch to Console depends on their account-level roles:
- With roles only in the Agent and Metrics categories, the account menu does not offer Exit to Console.
- An account-level role outside those categories also unlocks Console. The account menu then offers Exit to Console while in Business Suite, even when Limit to Business Suite is on.
Users who are not limited to Business Suite can switch using Enter Business Suite and Exit to Console when the feature is available.
Business Suite needs no roles of its own. Select roles for each task using the requirements in their canonical sources:
- Viewing Dashboards and Observability needs metrics read access. See metrics permissions for the authoritative role list.
- For listing agents versus saving instruction edits, review the separate read and update permissions in Role-based access control.
These are separate grants. A role that reads metrics does not by itself permit agent updates, and an agent role does not by itself enable the metrics pages. A user who both edits instructions and reads metrics needs coverage of each. Do not grant a write-capable role to a read-only user without reviewing the additional access it carries.
The account-level Agent Developer role makes all agents in the account visible and authorizes updates to their configuration through the API, not just to instructions marked editable in Business Suite. The simplified editing controls and Read-only instruction badges are UI behavior, not a separate API authorization policy. Agent Developer does not by itself grant agent creation, replacement, or deletion.
The administrator performing team setup needs Account Owner or Account Admin. Preparing instructions in the developer Console is a different task: the agent editor saves through the Replace agent operation, which requires Agent Administrator, Account Admin, or Account Owner at account level, or the applicable per-agent administrator role. This is distinct from saving an instruction edit through Business Suite's Update agent operation.
Configure the user
- Open Team in Console. If the person is not yet a team member, complete the invitation workflow first.
- Select the existing user's Username, then select Edit user.
- In Roles, turn on Limit to Business Suite.
- Review the user's existing roles and select the roles needed for their tasks using the permissions guidance above. The Permissions tab shows the operations associated with the selected roles. Account-level roles outside Agent and Metrics also enable Console access, even with the toggle on.
- Select Update team member. Check Console access in the Team list: it shows Business Suite when the toggle is on and the account-level roles are limited to Agent and Metrics, or All when another account-level role also unlocks Console.
For instruction editing, a developer must also mark the instruction editable in Business Suite. Then share the Business Suite guide with the user.